Category: Engine Electrical

Added Ammeter Shunt

August 18, 2021 – I decided to add the ammeter shunt.

In my research about the VPX addition to the airplane, I had read that an ammeter shunt is not required. What I inferred from that is that I would get an ammeter reading from the VPX. While that is true, the indication appears on the VPX page on the Dynon, and not on the engine bar on the main Dynon screens. You can select battery voltage specifically from the VPX to be displayed, but it doesn’t appear that there is that option for amps. The theory is that you can monitor battery voltage for a charge on the battery.

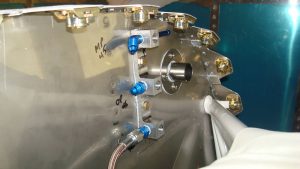
I decided that having an amp reading would give a better indication of charging health, so I installed the shunt. The hardest part of this was  installing the shunt on the firewall. I found the wires from the EMS box and ran them out through the firewall and across to the right side.

Then I installed the shunt and connected the wires. The shunt is in the wire from the ANL60 fuse to the VPX. I haven’t run the engine again since, but I get a 10 amp discharge with power on the airplane, which agrees with the reading on the VPX page.

Time: 2:45

Avionics and Wiring

August 10, 2020 – Just slogging through the avionics.

Engine CHT and EGT

I knocked out the EGT and CHT wiring so I could have some visual progress. Dynon provides spade terminals to match the harness wires which are already terminated. I allowed for service loops with each wire, and I tried to offset each one to reduce the bundle size when it’s all done.

I covered each connection with heat shrink. These are pretty solid.

Then I gathered the wires into bundles, one on each side of the engine.

Other Engine Indications

I connected the Red Cube fuel flow transmitter and the oil temp.

Power to VPX

I connected the wire from the ANL fuse that provides power to the VPX and therefore the rest of the avionics.

ADAHRS Mount

I’m using the Van’s Adahrs mount. This mounts the Adahrs just forward of the next bulkhead aft of the baggage compartment wall. I made sure it was level to the canopy rails before I drilled it.

I put the 3 fittings in the Adahrs and thought it would be easier to install the unit in the bracket before it went up in the tailcone.

Ummmm, no.

The bracket is pop-riveted into place, and I couldn’t get my riveter to some of the fasteners. So I laid there and removed the Adahrs so I could get to the rivets, then reinstalled it. I’m actually pretty sure I’m going to have to remove it again so I can get the Skyview network connector attached.

GPS Antenna

I made a bracket for the GPS antenna that attaches to the engine mount aft of the baffle. I didn’t want the antenna on the glareshield, and with the Adahrs in the back, there was no really ideal place to mount the GPS externally. If I figure something different, this bracket is not a huge commitment.

Com Radio Trays

I decided to mount the Com radios front and center on the sub-panel bulkhead.

Time: 23:15

Panel continues

July 15, 2020 – Work continues on the panel and avionics.

I started the connection for power to the VPX. This wire will run from the ANL fuse to the power lug on the VPX.

I located and installed the EMS module for engine management. I decided to drill a hole in the sub-panel for a length of conduit so all the EMS wiring can run straight from the firewall back and come in right next to the EMS module.

Here’s the wires coming through the firewall.

I decided to label all the wires in this bundle, so I can just grab the wires I need for a particular component and finish the wiring. I found the pinout and wire list for the engine sensor connector and rang out each wire. This confirms that the pinout is correct, and leaves out the guesswork.

I relocated the manifold pressure sensor from inside the cockpit to the outside, so I don’t have air hoses running through the firewall, only wiring. Then I found the appropriate wires for the sensor, and terminated and installed them.

Time: 9:20

Installed Engine Sensors

June 25, 2020 – I also installed the fuel and oil pressure sensors.

Dynon released a service bulletin for their Kavlico sensors. I called them since my sensors were still brand-new and in the packages. Since I’ve had them for more than a year, they really couldn’t help me. They also said, however, that the Service Bulletin was released with an abundance of caution, and that I could install mine and just keep an eye on them. That seemed reasonable to me.

Time: :20

Installed Plug Wires

June 25, 2020 – I ran the plug wires on the engine.

I don’t have the plugs in yet, so I’ll probably have to adjust the wires a bit to clean this all up. For the lower wires I used clamps on the lower screws of the valve covers. I used a couple of automotive wire looms to keep wires straight behind the engine.

The upper wires need to be secured. On the right side the wires will run straight to the plugs from the baffle fairlead. On the left side I added clamps to the existing clamps for the fuel lines where they are secured to the pushrod tubes. I made spacers to separate the clamps.

Time: 2:00

Made New Starter Cable

May 29, 2020 – I didn’t like how my starter cable was routed, so I made a new one.

Here’s how I originally had it. Kind of hard to see but you are looking for the thick white cable with the red heat-shrink end on it.

The cable ran under the starter, with a lot of potential for rubbing.

I ran the new cable straight back behind the starter, then across to the right side. The cable I made could have been maybe and inch or so shorter, but I can live with the gentle bend it has now.

The pictures show the routing from the starter back around to the start contactor. None of the clamps are tight. They will be tightened later on.

I made a stainless steel bracket for the clamp in the third picture. This is front and center on the sump.

Time: 3:20

More Cockpit Work

March 12, 2020 – I installed a couple of items on or near the firewall.

I installed the manifold pressure sensor in the cockpit. Tried to find an out of the way corner. I’ll probably move it to the forward side of the bulkhead, so the hose doesn’t have to bend back to where it attaches.

I also attached a ground bus. This will provide my engine ground and connect it to other grounds in the cockpit.

Time: 1:45

Battery Cables

January 10, 2019 –  I continued work on the battery cables because I’m borrowing the crimper and the guy said he’d need it back.

I had to order some 1/2″ heatshrink in red and black to fit over these terminals. Once I had that, I made the cable from the contactor to the starter, and the ground from the battery to the firewall.

These pictures of the starter cable ARE NOT final installation, they are for routing and fitting. Hopefully this location will work.

Time: 2:00

Miscellaneous Firewall Forward stuff

October 17, 2018 – I realized it’s been a while since I posted an update, so here goes…

Engine control cables

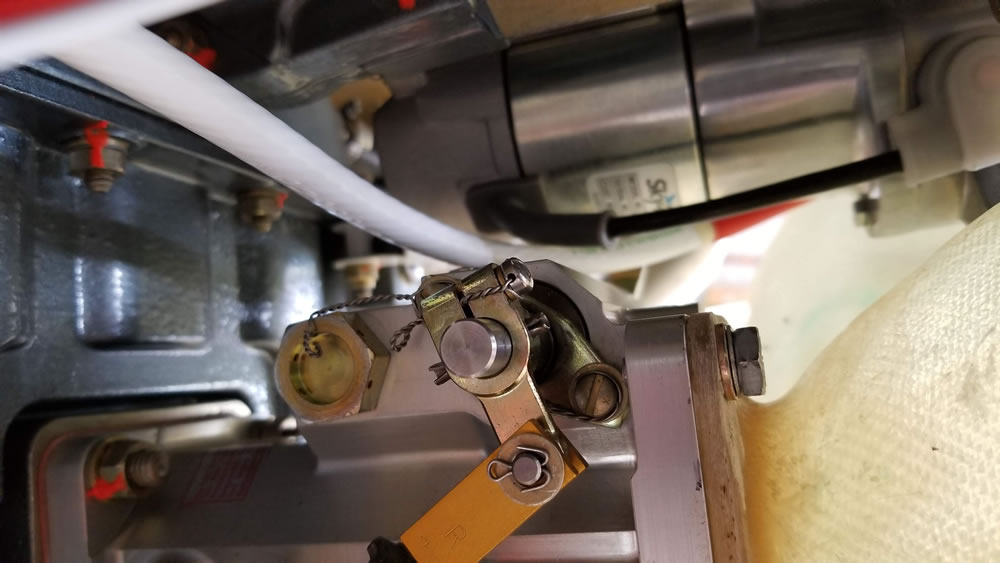
I started assembling the parts for engine controls: throttle, mixture and prop. I started with the mixture, since it’s a fairly complicated bellcrank system that reverses motion. The first problem that I ran into was that the mount bracket for the bellcrank does not fit as advertised on my engine. Right where this bracket is supposed to go, there is a drain plug in a boss on my Superior cold-air sump.

I found online where someone else had this same problem. They started by grinding down the height of the plug. So I did that, but the boss that the plug is in will not allow the bracket to sit in place.

I decided to trim the bracket until it does fit. After everything is installed and works, I’ll take the bracket off and make a new one. You can see that I removed a lot of material. That’s fine.

So I assembled the bellcrank and moved on.

I measured for the three cables, since I am using a throttle quadrant instead of the traditional push-pull controls supplied by Van’s. I ordered some from Van’s and just got them today. I also drilled the holes in the firewall at the three recommended locations. They’re just 1/2″ right now. I’ll take them to final size when I start test-fitting the cables.


Fuel Flow Transducer

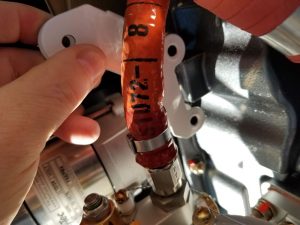
I figured out where I’d like to mount the Red Cube. It will be inline between the servo and the flow divider, and I’ll mount it on the engine mount behind #3 cylinder. I had the long fuel hose that goes there…I sent it to Tom Swearengen at TS Flightlines. He took care of me. I’m a big fan…

Oil Temp Sensor

I installed the oil temp sensor as required…

Engine Electrical

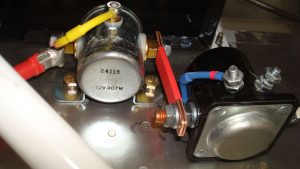
I’ve been slowly working on cables for the battery, starter, etc. The only picture I have right now is the copper bar between the contactor and the relay. I replaced the one bar I had with two that total .125″, which is closer to the plans.

I got in touch with a guy who was in town and bored (he posted on Van’s Air Force). He was looking to see if anybody needed a hand with anything. So he came over today to visit, and we took care of a short list of items I needed an extra pair of hands to get done.

We installed the firewall pass-thrus, and I needed to remove the manifold on the firewall so I could get fittings in it. We removed it, installed the required fittings, and reinstalled it. If I ever have to take that manifold off again, I’ll install nutplates.

Time: 13:10