Category: Engine Accessories

Installed Engine Sensors

June 25, 2020 – I also installed the fuel and oil pressure sensors.

Dynon released a service bulletin for their Kavlico sensors. I called them since my sensors were still brand-new and in the packages. Since I’ve had them for more than a year, they really couldn’t help me. They also said, however, that the Service Bulletin was released with an abundance of caution, and that I could install mine and just keep an eye on them. That seemed reasonable to me.

Time: :20

Firewall Forward Items

April 4, 2020 – I dealt with the manifold pressure installation.

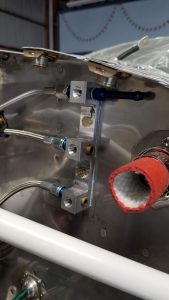
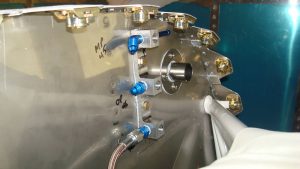
To begin with, I moved the MAP sensor from the aft side of the subpanel bulkhead to the front. This gives a direct shot for the pressure tube from the firewall straight into the sensor.

I got brass T’s with the correct dimensions to run tubing at the firewall from the engine MAP line to the sensor manifold on the left side. I bought another manifold block from Vans and used it for the interface.

Time: 2:50

More Work Firewall Forward

March 6, 2020 – I continued to whittle away at the little chores that need to be done forward of the firewall.

I don’t have a picture, but I connected the vacuum hoses to the P-Mags. I’m still not sure how my final manifold pressure installation will look.

I continued to clamp lines and hoses.

I bought a dust cover for the engine tach drive.

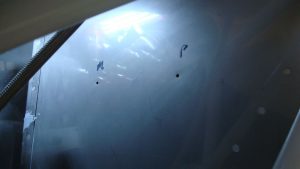
I also drilled a hole in the lower cowl for the fuel drain line. Here’s the location mark for the hole.

I drilled the hole in the lower cowl. Here’s the drain line with the cowl installed.

Time: 1:45

Continued various Firewall Forward items

February 2, 2020 – I continued work on securing firewall forward items.

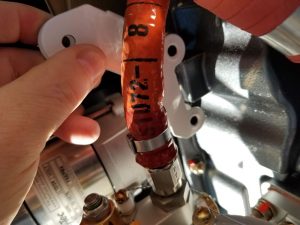
I ran the line for the mechanical fuel pump drain. This will vent through the lower cowl, a short distance from the exhaust.

I secured the Red Cube.

I installed the sniffle valve. Not sure how this is going to work out, though, because of its proximity to the exhaust.

A friend came by and helped me secure the clamp for the oil breather tube.

We also pulled the manifold off the firewall so I could replace a 45-degree fitting with a straight one. Maybe sometime I’ll get smart and put nutplates on this…

Time: 2:00

Continued Baffles and various Firewall Forward items

October 10, 2019 – Because the baffles can block access to some items, and there’s a lot of items that are dependent on other items being installed, I’m installing several items along with the baffles.

The prop oil line passes through the right front ramp, so I needed to install that. What a pain. The grommet fits, but the ramp stack-up is pretty thick, and the grommet is really hard to get into place.

Here’s the view from above and below.

I also installed the oil dipstick tube.

I wanted to check the routing of the tubes for the oil cooler, so I temp installed the cooler and loosely routed the oil lines in and out. Nothing here is permanently installed yet.

After painting the inlet on the left side, I temp installed it. The way I’ve done this, the snorkel and the baffle are a single assembly. It’s kind of a pain, but it can be installed and removed as a unit. The one issue is that the forward left baffle that goes up behind the spinner needs to be installed separately. So I’m using screws and nuts here.

I just started on the baffle seals, but no picture yet. That’ll be next time.

Time: 15:00

Alternate Air Door

October 10, 2019 – I installed the alternate air door in the snorkel.

Alternate air provides an unfiltered air source for the engine in the event there is a blockage at the air filter. I went with the stock door supplied by Van’s. This door is a one-way door, meaning once it’s opened it can’t be closed in flight.

The snorkel has a flat area that is the location for the door. A hole is cut the for the adapter ring.

The tab on the top gets bent down, then crimped on one side. This provides a stop forthe door when it’s closed.

I riveted the ring in place including the nut plate for the hinge, then faired with resin and flox.

I attached the door. I’m going to wait on the cable until everything else forward of the firewall is going in for good.

Time: 1:10

Replaced fuel mixture arm

July 9, 2019 – I needed to replace the mixture arm on the fuel servo.

When installed, the bolt in the arm that came with my engine just barely touched the starter. The Precision part number was 2521196.

I called Precision’s Product Support. I got the somewhat reasonable suggestion to remove the starter and hand-prop. Ha ha. Then he said that if I sent this arm in, he would swap it out with a shorter one. The other alternative was to pay $200.00 for another one.

I got the replacement arm a few days later. Put it on today and it’s a thing of beauty. This part number is 2521287.

On to other things…

Time: 1:00

Continued engine cable installation

June 5, 2019 – I started to permanently install the engine cables. I’ll be glad when this is done.

I’m using the aluminum firewall eyeballs from Vans. I had previously drilled the holes in the firewall; I routed the cables through them and partially installed the eyeballs. Have a couple of issues with the attaching screws; I need to order a few more.

I connected the business ends of the cables. Here’s the mixture bellcrank:

I’ll post better pictures of each connection when they’re done.

I’m still working on connecting the cables at the throttle quadrant. I may grind each clevis down a little bit for clearance, since they’re so close together, but it’s pretty good as it sits right now.

Time: 3:45

Miscellaneous Firewall Forward stuff

October 17, 2018 – I realized it’s been a while since I posted an update, so here goes…

Engine control cables

I started assembling the parts for engine controls: throttle, mixture and prop. I started with the mixture, since it’s a fairly complicated bellcrank system that reverses motion. The first problem that I ran into was that the mount bracket for the bellcrank does not fit as advertised on my engine. Right where this bracket is supposed to go, there is a drain plug in a boss on my Superior cold-air sump.

I found online where someone else had this same problem. They started by grinding down the height of the plug. So I did that, but the boss that the plug is in will not allow the bracket to sit in place.

I decided to trim the bracket until it does fit. After everything is installed and works, I’ll take the bracket off and make a new one. You can see that I removed a lot of material. That’s fine.

So I assembled the bellcrank and moved on.

I measured for the three cables, since I am using a throttle quadrant instead of the traditional push-pull controls supplied by Van’s. I ordered some from Van’s and just got them today. I also drilled the holes in the firewall at the three recommended locations. They’re just 1/2″ right now. I’ll take them to final size when I start test-fitting the cables.


Fuel Flow Transducer

I figured out where I’d like to mount the Red Cube. It will be inline between the servo and the flow divider, and I’ll mount it on the engine mount behind #3 cylinder. I had the long fuel hose that goes there…I sent it to Tom Swearengen at TS Flightlines. He took care of me. I’m a big fan…

Oil Temp Sensor

I installed the oil temp sensor as required…

Engine Electrical

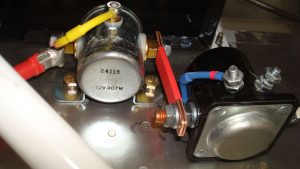
I’ve been slowly working on cables for the battery, starter, etc. The only picture I have right now is the copper bar between the contactor and the relay. I replaced the one bar I had with two that total .125″, which is closer to the plans.

I got in touch with a guy who was in town and bored (he posted on Van’s Air Force). He was looking to see if anybody needed a hand with anything. So he came over today to visit, and we took care of a short list of items I needed an extra pair of hands to get done.

We installed the firewall pass-thrus, and I needed to remove the manifold on the firewall so I could get fittings in it. We removed it, installed the required fittings, and reinstalled it. If I ever have to take that manifold off again, I’ll install nutplates.

Time: 13:10

Installed CHT and EGT probes

September 7, 2018 – Today I installed the CHT and EGT probes. I’ve ordered a lot of small items from Spruce, and I’m kind of on hold with a lot of things. This I could do today.

Pretty straight-forward; I used some anti-seize to install the CHT probes. These probes from Dynon have a quick-disconnect feature.

The EGT probes use a hose clamp setup to hold the probes. I drilled  1/8″ holes in each exhaust pipe 3″ down from the flange on the cylinders. Insert the probe, tighten the clamp, that’s it.

Time: :50

Installed Prop governor

September 6, 2018 – I installed the prop governor.

I wasn’t sure about the orientation of the governor on the engine. So I did some online research, and found the orientation that seems to be correct. I definitely had to reclock the control head. With the governor in the correct position on the engine, the control arm faced down, when it’s supposed to be up. The instructions tell you how to reclock it.

You just break the safety wire on the top screws, loosen them, and rotate the head to the desired position. I went 180 degrees out from the original position. I also had to install the bracket for the cable, so I had to loosen those screws anyway.

I installed the governor on the engine. The nuts are pretty hard to get on to torque. I’m pretty sure this whole project is going to be that way, and get worse all the time.

Time: 2:15